
How to Create and Switch Git Branches Without Losing Your Work
Learn how to create a Git branch and switch between branches with git branch, git switch, and checkout, without fear of breaking main or losing your code.
You’ve been committing straight to main for two weeks. Everything works, and that’s exactly why you’re afraid to touch anything. You want to try an idea that might break half the project, but you don’t dare, because that code is the good one. This is where creating a Git branch comes in: a separate space to experiment without risking what already works. Let me explain what a branch actually is, how to create one, and how to move between branches with git branch, git switch, and git checkout, without losing a single line along the way.
To follow this post you just need to know how to make a commit. If you’ve already typed git add and git commit before, you’re more than ready.
What Is a Git Branch, Really?
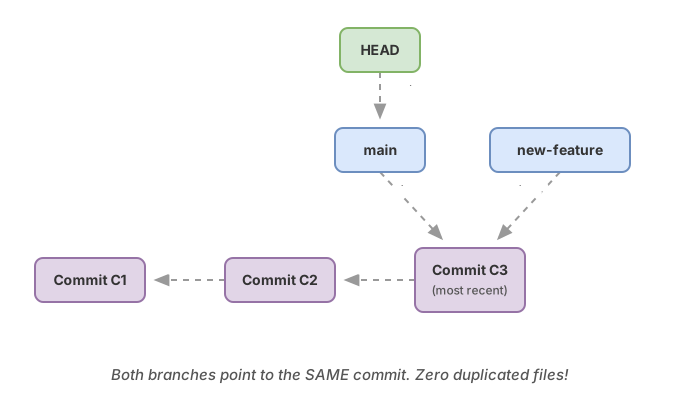
A Git branch is a movable pointer to a specific commit. Forget about folders, copies of your files, or a ZIP of the project: a branch is just a label that says, “the work on this line goes here.”
Think of your commit history as a row of photos, where each commit is a snapshot of the project at a given moment. A branch is a sticky note attached to one of those photos. When you make a new commit, the sticky note peels itself off and reattaches to the newest photo. That’s why we say the pointer is movable: it follows you as you work.
main is a branch like any other. The only special thing about it is that Git creates it by default. And there’s a second pointer, HEAD, that marks which branch you’re currently on. When you create a new branch, Git just writes one more pointer pointing at the same commit. Nothing gets copied. That’s why creating a branch is instant even if your project has thousands of files.
If you want the full mental model of how branches, commits, and pointers fit together, you’ll find it in the complete guide to Git branches. Here, let’s get practical: the commands.
How Do I See the Branches I Already Have?
The git branch command, with nothing else after it, lists all the local branches in your repository. The branch you’re currently on shows up marked with an asterisk.
# Lista todas las ramas locales del proyecto
git branch
In a freshly started project, the output will look something like this:
* mainThe exact name of that first branch, main or master, depends on how your Git is configured; these days main is the standard, so don’t be alarmed if you see master on your machine. That asterisk is what matters. It tells you where HEAD is, in other words, which branch your next commits will land on. If you have five branches tomorrow, this command tells you at a glance which one you’re standing on before you touch anything. Get in the habit of running it whenever you’re unsure.
How Do I Create a New Branch?
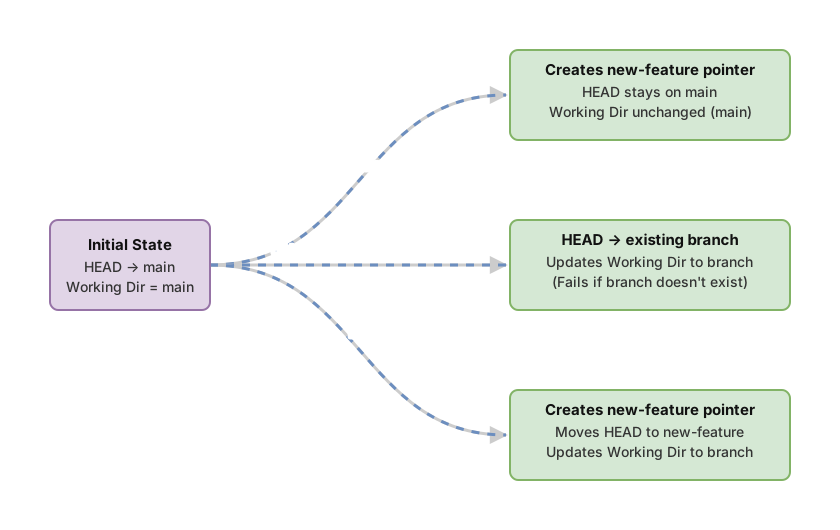
The git branch name command creates a new branch starting from the commit you’re on, but it doesn’t switch you to it. You stay exactly where you were.
# Crea una rama llamada 'nueva-funcion' a partir de donde estás ahora
git branch nueva-funcion
Git prints nothing if everything goes fine. And here’s the trap that catches almost everyone when they’re starting out. If you list the branches again, you’ll see both, but the asterisk hasn’t moved:
* main
  nueva-funcion
You did create the branch, yes. But you’re still on main. Any commit you make now goes to main, not to nueva-funcion. That’s why git branch alone is really only useful for creating branches you’re going to leave parked, or for listing them. To work on the new branch, you first have to switch to it.
How Do I Switch to Another Branch?
The git switch name command moves you to a branch that already exists and updates the files in your working directory to match that branch.
# Te mueve a la rama 'nueva-funcion' y ajusta tus archivos a esa rama
git switch nueva-funcion
The output confirms the switch:
Switched to branch 'nueva-funcion'What does “updates the files” actually mean? That Git rewrites your working directory so it looks like the branch you just jumped to. If nueva-funcion has a file that isn’t on main, it shows up. If you’d deleted something on main that still exists on the other branch, it comes back. There’s no magic or danger here: each branch has its own snapshot of the project, and switch puts you in front of the right one. Your saved commits aren’t touched, only what you see in the editor changes.
Now your commits land on nueva-funcion. main stays intact, exactly as you left it, waiting for you.
The Shortcut: Create and Switch in One Command
Creating with one command and switching with another works, but you almost never want to create a branch just to leave it empty. You want to create it and start working on it right away. That’s what git switch -c name is for: it does both things at once, creating the branch and switching you to it.
# Crea la rama 'arreglo-login' y te cambia a ella en un solo paso
git switch -c arreglo-login
The -c stands for “create”. The output changes slightly compared to a regular switch, because now the branch is new:
Switched to a new branch 'arreglo-login'There’s an older equivalent you’ll see in a ton of tutorials: git checkout -b name. It does exactly the same thing, creating the branch and switching you to it.
# El clásico: crea 'arreglo-login' y te cambia, igual que switch -c
git checkout -b arreglo-login
Both commands produce the same result. The difference is in which one you should reach for today.
git switch or git checkout: Which Should I Use?
Use git switch. It’s clearer and does exactly one thing: move you between branches. git checkout is still valid, but it’s a heavily overloaded command that also discards changes in files, restores old versions, and more. That overload is exactly what makes beginners slip up and discard work by accident.
Git split that responsibility into two newer commands: git switch for switching branches and git restore for discarding changes. git switch landed in Git 2.23 (2019) and today is a stable, recommended command. If a tutorial describes it as “experimental”, that information is outdated.
Here are the four commands from this post in a table, so you can see at a glance what each one does:
| Command | Creates the branch? | Switches you to it? |
|---|---|---|
git branch arreglo-login | Yes | No, you stay where you were |
git switch arreglo-login | No, the branch must already exist | Yes |
git switch -c arreglo-login | Yes | Yes, in a single step |
git checkout -b arreglo-login | Yes (classic version) | Yes |
With this, you’re ready to move around. Before we look at what happens when something goes wrong, try the move yourself: create a branch and switch to it in this interactive exercise, without leaving this page:
Loading exercise...
Common Mistakes When You’re Starting Out with Branches
Creating the Branch and Assuming You’re Already On It
This is mistake number one. You run git branch mi-idea, start coding convinced you’re on the new branch, and in reality every one of your commits is landing on main. By the time you notice, your “experiment” is mixed in with the good code. The rule to avoid this: after git branch, run git branch again and check where the asterisk is. Or just use git switch -c and skip the problem entirely.
Uncommitted Changes Blocking the Switch
If you try to switch branches with half-finished work that would overwrite files on the other branch, Git stops you cold:
error: Your local changes to the following files would be overwritten by checkout:
	src/login.ts
Please commit your changes or stash them before you switch branches.
Aborting
Git does this to protect you from losing work. It’s telling you that you have unsaved changes that would be lost if you switched. (Notice that the message mentions checkout even though you typed git switch: under the hood they share the same mechanism, so you’ll see that word in the warning.) The simplest fix for a junior: commit what you have, then switch. Once you have more practice, you’ll learn git stash, which parks changes temporarily. For now, commit and move on.
The Branch Already Exists
If you try to create a branch with a name that’s already taken, Git doesn’t overwrite it or give you a half-warning, it just cuts you off:
fatal: a branch named 'arreglo-login' already existsPick a different name, or if you actually wanted to go back to that branch, use git switch arreglo-login without the -c, since it already exists.
Working for Weeks Without Ever Leaving main
This isn’t a command mistake, it’s a habit mistake, and it’s the most expensive one. The longer you spend piling up loose changes on main, the harder it gets to separate what works from what you were just testing. Create a branch as soon as you start anything non-trivial. It costs one command and saves you entire afternoons of untangling code.
The Next Step: Using the Branch and Closing It Out
Creating and switching branches is just the start of the cycle. Once your branch has commits, the natural next step is bringing that work back into main, and that’s done with a merge: it’s explained step by step in Git merge explained. And once a branch has served its purpose, it’s worth clearing it out of the way so old branches don’t pile up, which we cover in how to delete a branch in Git. Create, work, merge, and delete: that’s the complete life cycle of a branch.
If you want to practice all of this with guided exercises, without installing anything and with feedback as you go, the Git from Zero to Professional course covers branches, merges, and conflict resolution with interactive examples like the one above. It’s the fastest way to get these moves into your fingers.
Frequently Asked Questions
Does Creating a Git Branch Copy All My Files?
No. A branch is just a pointer to a commit, so creating a Git branch doesn’t duplicate anything on disk. That’s why it’s an instant operation, whether your project has ten files or ten thousand. The only thing Git writes is a new pointer aimed at the commit you were on.
Do I Lose My Work When I Switch Branches?
You don’t lose anything you’ve already committed. Each branch keeps its own line of commits, and when you come back to it, you’ll find it exactly as you left it. The only tricky moment is uncommitted changes: if you have half-finished work and jump to another branch, Git will warn you or block you before letting you lose anything. The healthy habit is to commit before you switch.
Should I Use git switch or git checkout to Create a Branch?
Use git switch -c name. It’s the modern command, stable for years now, and it does only what you’d expect: create the branch and switch you to it. git checkout -b name gives the same result and you’ll see it a lot in older tutorials, so it’s worth recognizing, but for your own commands, switch is the safer choice.
How Should I Name My Branches?
With short, descriptive names that say what’s inside, in lowercase and with words separated by hyphens:
# Bien: dice de qué va la rama de un vistazo
git switch -c arreglo-login-caducado

# Evítalo: espacios y acentos dan problemas en la terminal
git switch -c "Login Móvil"
A good branch name is one that, weeks later, tells you at a glance what it was for without having to open it.
Related articles
Git Branches: Create, Merge, and Resolve Conflicts Without Panic
What a Git branch really is, how to create one, merge it with git merge, and resolve a conflict step by step. Plus merge vs. rebase without fear.
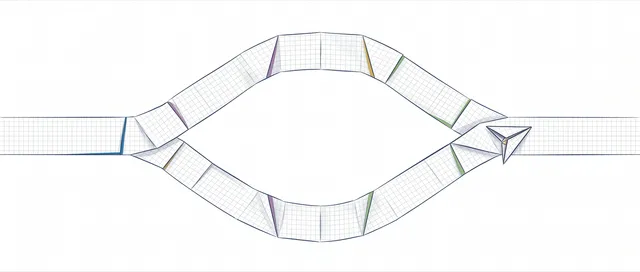
Git merge explained: fast-forward vs 3-way merge
What git merge does under the hood, when it produces a fast-forward and when a three-way merge commit, and how to read the resulting graph.
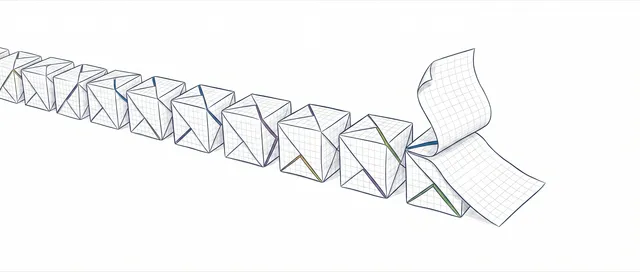
How to Delete a Branch in Git: Local, Remote, and Recovery
How to delete a Git branch locally and remotely without fear: git branch -d and -D, git push origin --delete, and recovering a deleted branch with reflog.