
Team Git Workflow: Your First Day, Step by Step
The daily team Git cycle: updating main, creating a feature branch, small commits, opening a Pull Request, passing review, and merging.
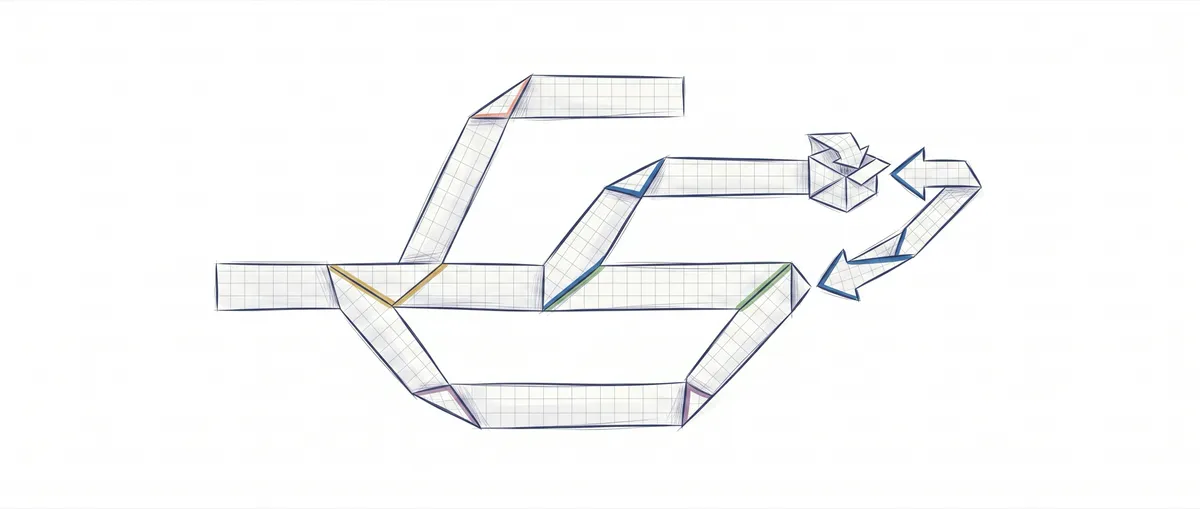
On your first day on a team, the scary part isn’t writing code: it’s breaking someone else’s work. You already know how to run git add, git commit, and git push, but in your own projects you were the only one touching the repository, so it never really mattered how you left things. A team Git workflow is the protocol that lets eight people touch the same project without stepping on each other. This is the cycle you’ll repeat every day, step by step, and the moves that give away a newcomer.
Why Doesn’t Solo Git Prepare You for a Team?
Solo, main is yours. On a team, main belongs to everyone, and if you break it, you block the people who were building on top of it. That’s the underlying shift, and every rule that follows comes from it.
When you code alone, you commit directly to main because no one else reads it. The history is your private diary: it doesn’t matter if a commit is called “changes” and contains half the project. The moment you join a team, that same history becomes something other people will read, review, and integrate with their own work. And main stops being your sandbox and becomes the version that gets deployed.
| Aspect | Solo | On a team |
|---|---|---|
| Where you write code | Directly on main | On an isolated feature branch |
| Who reads your history | Only you, sometimes | Whoever reviews your Pull Request |
| When you integrate | Whenever you want, no heads-up | After a review, with main up to date |
| Who approves the change | No one | At least one other team member |
If you break main | It’s annoying for you | It blocks everyone building on top of it |
That leap sounds like bureaucracy until you live it. The first time someone builds a feature on top of your broken commit, you understand why the cycle exists. You can find the full explanation of why teams work this way in working as a team with Git and GitHub; here we’re going straight to the concrete cycle.
Step 1: Always Start From an Up-to-Date main
Before writing a single line, switch to main and pull the latest changes from the remote. main moved forward while you were asleep, because other people merged their work, and branching from an old version is the quietest way to create conflicts for yourself.
# Switch to main and pull whatever the team has merged
git switch main
git pull
git switch is the command for moving between branches. For a while it carried an “experimental” note, but that note has since been dropped: today it’s stable and the recommended way to change branches. git pull downloads what’s new from the remote and integrates it into your local main. After these two commands, your starting point is identical to the rest of the team’s. Now you can actually branch off.
Step 2: Create a Feature Branch for Your Task
Each task lives on its own branch, created from that fresh main. A branch is a parallel line of work: you write there, break things there, experiment there, and main stays intact the whole time.
# -c creates the branch and switches you to it in one step
git switch -c feature/validar-email
The feature/ prefix is a convention, not a Git rule. Git doesn’t care what the branch is called, but the team does: a name like feature/validar-email tells you at a glance what’s inside. Many teams use feature/, fix/, or chore/ as a prefix; look at how your teammates name their branches and copy that style. The rule that IS Git’s: that branch starts from whatever main you were on, so updating it beforehand (step 1) wasn’t optional.
Step 3: Make Small, Frequent Commits
A small commit is a message to the person who’s going to review your code. When you worked alone, a commit just saved your progress, full stop. Now it has a second reader, and that reader needs to follow your reasoning without sitting next to you.
Compare these two histories. One tells a story; the other is a black box.
a3f9c21 feat: validate email format on signup
7b2e410 test: add invalid email cases
c8d1f05 refactor: extract the regex into a constant
Versus a single commit d4e0f88 misc changes with forty files inside. The first one gets reviewed in five minutes because each step is one idea. The second forces your teammate to reconstruct everything you did in their head, and that’s exactly where bugs slip through review unnoticed.
One practical detail that trips up a lot of people starting out: git commit -am only stages files Git is already tracking. If you’ve created a new file, that shortcut ignores it, and you have to run git add explicitly:
git add src/validators/email.ts
git commit -m "feat: validate email format on signup"
Step 4: Push Your Branch With git push -u
Your branch only exists on your machine until you push it to the remote. And until it’s on the remote, the team can’t see it and you can’t open a Pull Request with it.
# The first time, -u links your local branch to the remote one
git push -u origin feature/validar-email
The -u flag (short for --set-upstream) links your local branch to the remote one. It’s a first-time-only gesture: from then on, every new commit gets pushed with a plain git push, no need to repeat the branch name, because Git already knows where it goes. If you skip it the first time, Git reminds you with the exact command you’re missing.
Step 5: Open a Pull Request
A Pull Request is the formal request to merge your branch into main. You open it from GitHub once your branch is pushed, and from that moment on your work stops being just yours: it becomes a proposal the team can read, comment on, and approve.
The PR description is the part that gets neglected the most and appreciated the most. Don’t repeat what the commits already say. Explain the why: what problem it solves, what decision you made and why, and what the reviewer should scrutinize closely. If the email is now validated with a specific regular expression, say why that one and not another. A good PR answers the questions before your teammate has to write them. If you want the full breakdown of what a Pull Request is and how it’s structured, I cover it in what a Pull Request actually is.
How Do I Take Code Review Without Taking It Personally?
Review comments are aimed at the code, not at you. This is the hardest part on your first day, because no one warns you that seeing lots of comments on your PR is normal and good, not a sign you did something wrong.
Review works like this: someone reads your diff, leaves comments, and maybe requests changes. You respond, fix what makes sense, and push back with arguments on what doesn’t. When you change something, you make new commits on the same branch and push them with git push; the Pull Request updates itself. Every comment you address is one less bug reaching production, and the reviewer is putting their name next to yours on that merge. They’re on your side.
What IS a bad sign: responding defensively, or merging while ignoring comments because you were in a hurry. That burns trust faster than any bug.
Step 6: Merge, Then Delete the Branch
Once the PR is approved, it gets merged and your code lands in main. On almost every team, the merge happens from the GitHub button, not from your terminal, so there’s a record of who approved what. From there, your branch has served its purpose.
# Go back to main, pull in your own now-merged change, and delete the local branch
git switch main
git pull
git branch -d feature/validar-email
git branch -d only deletes the local branch if it’s already merged into main, so it’s a safety net: if Git refuses, it means there are still unmerged commits there. The remote branch is usually deleted straight from the merge button on GitHub. It gets deleted because its history now lives inside main; keeping it around only fills your branch list with ghosts nobody remembers the purpose of.
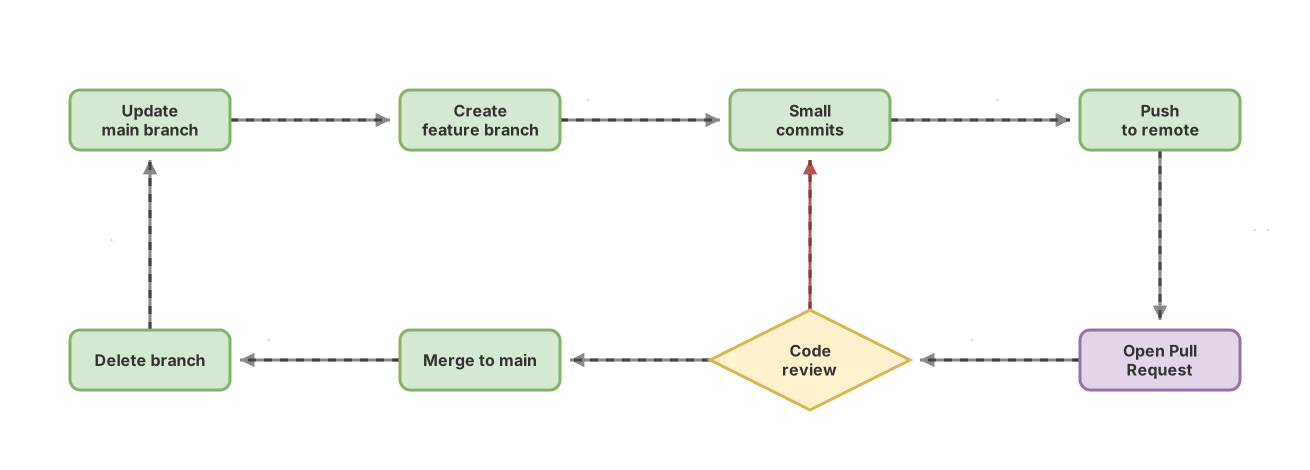
And with that, the cycle is closed. You go back to step 1 for the next task, starting again from an up-to-date main that now includes your own work. As the team grows and you need stricter rules about when and how to branch, that’s where branching strategies like Git Flow, GitHub Flow, and trunk-based come in. For your first day, this cycle has you fully covered.
Before moving on, put the steps of the cycle in order yourself. This exercise scrambles the phases so you can arrange them the way you would on your first day:
Loading exercise...
First-Day Mistakes
Working Directly on main
The classic. You run git switch main out of habit, write your code there, and push it. Now your half-finished work is sitting on the branch that gets deployed, unreviewed, mixed in with everyone else’s. Mental rule: if you check which branch you’re on and see main, don’t write yet, branch first.
One Giant Branch With a Single Forty-File Commit
You work in silence for two weeks and dump everything into a single commit at once. Nobody can actually review that, so whoever reviews it scrolls through, gives up, and approves it blind. You’ve turned the review into an empty formality. Break it into small commits, and if the task is huge, into several PRs.
git push --force on a Shared Branch
Forcing a push rewrites the remote history and can delete commits from someone else who was working on your branch. If you genuinely need to force, git push --force-with-lease is safer because it fails if the remote moved forward since the last time you looked at it, instead of overwriting it without asking. It’s not the only safe way to force-push, but it’s the one that avoids the most common accident. On a branch other people touch, the best move is simply not to force at all.
Branching From a Stale main
You skip the git pull from step 1 and create your branch on a version from three days ago. Everything’s fine until you open the PR and a mountain of conflicts shows up that have nothing to do with your task. Updating main before branching saves you that entire afternoon.
Taking Review Personally
We already said this above, but it bears repeating because it’s the mistake that burns the most people out in the first month: comments are about the code, and addressing them is exactly the job, not a punishment.
Your First-Day Checklist
- Before branching,
git switch mainfollowed bygit pull - Each task on its own feature branch with a descriptive name
- Small commits, each with a single idea and a clear message
- Explicit
git addfor new files (don’t rely on-am) -
git push -u origin <branch>the first time; justgit pushafter that - The PR describes the why of the change, not just the what
- After the merge, delete the local branch with
git branch -d
Practice the Cycle Before Your First Day
Reading about the cycle is one thing, having it in your fingers is another. In the Git from Zero to Professional course, you walk through this workflow in a guided environment: you create the branch, make the commits, open the Pull Request, and pass review until the cycle becomes second nature, with no fear of breaking anything real.
Frequently Asked Questions
Can I Have Several Feature Branches at Once?
Yes, and it’s normal. Each independent task goes on its own branch, and you move between them with git switch <name>. The one thing worth avoiding is starting a new branch from another unfinished branch, because that ties the fate of both together.
How Often Should I Commit?
Every time you finish a small, coherent idea: a function that now validates, a test that passes, a refactor that’s closed. Don’t wait until the end of the day. One commit per idea makes your history read like a set of logical steps and makes reverting something specific trivial.
What Do I Put in the Pull Request Description?
The why, mostly. Explain what problem the change solves, what design decision you made, and where the reviewer should focus. The commits already tell the what; the description tells the context that doesn’t fit in a commit message.
What If They Request Changes in Review?
You fix what makes sense and discuss it if it doesn’t. You make new commits on the same branch, one git push, and the Pull Request updates itself without you having to open another one. Requesting changes is the healthy part of a team’s Git workflow, not a rejection.
Do I Have to Delete the Branch After the Merge?
Yes. Once merged, its history already lives inside main, so the branch only takes up space and causes confusion. Delete the local one with git branch -d and the remote one from the merge button on GitHub. If you need that code later, it’s still there in main’s history.
Related articles
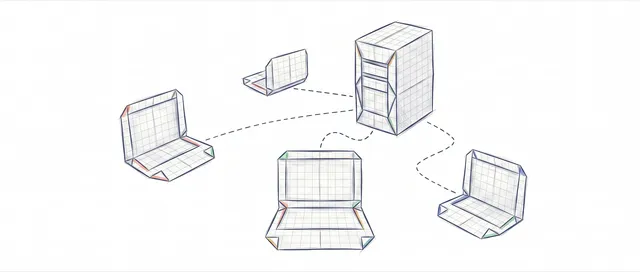
Working as a Team with Git and GitHub: Remotes, PRs, and Code Review
From a local commit to a shared repo: the distributed model, remotes, the push/pull/fetch cycle, Pull Requests, and code review, without stepping on anyone else's work.
What Is a Pull Request and How to Open Your First One
A pull request is the proposal to merge your branch that GitHub or GitLab add on top of Git. Learn what it is and how to open yours step by step.
GitFlow vs GitHub Flow vs Trunk-Based: Which One to Choose
A senior comparison of the three branching strategies: tradeoffs, when to use each one, and how to migrate without breaking your team.