
git add, commit, and push: Git's basic workflow explained
What git add, git commit, and git push actually do, and why they're three separate steps: a change's journey through Git's four areas, explained from scratch.
You copied git add ., git commit -m "...", and git push from some tutorial, and ever since you’ve typed them like a magic spell. Three lines in a row, always the same ones, without really knowing what each does. If it works, it works. But at some point you hit a nothing to commit or an unexpected Everything up-to-date, and that’s where the spell stops working. The real question is: why three commands to save your work instead of one? This post turns those three lines into a mental model you can actually reason about.
To follow along you need Git installed and a repository already initialized with git init or cloned with git clone. If you’re not there yet, start with the getting-started guide for Git and come back afterward.
Why does Git need three steps instead of one?
Git uses three commands because your work passes through four distinct places before it reaches a server, and each command pushes it from one place to the next. It’s not bureaucracy. It’s what gives you control over what you save and when.

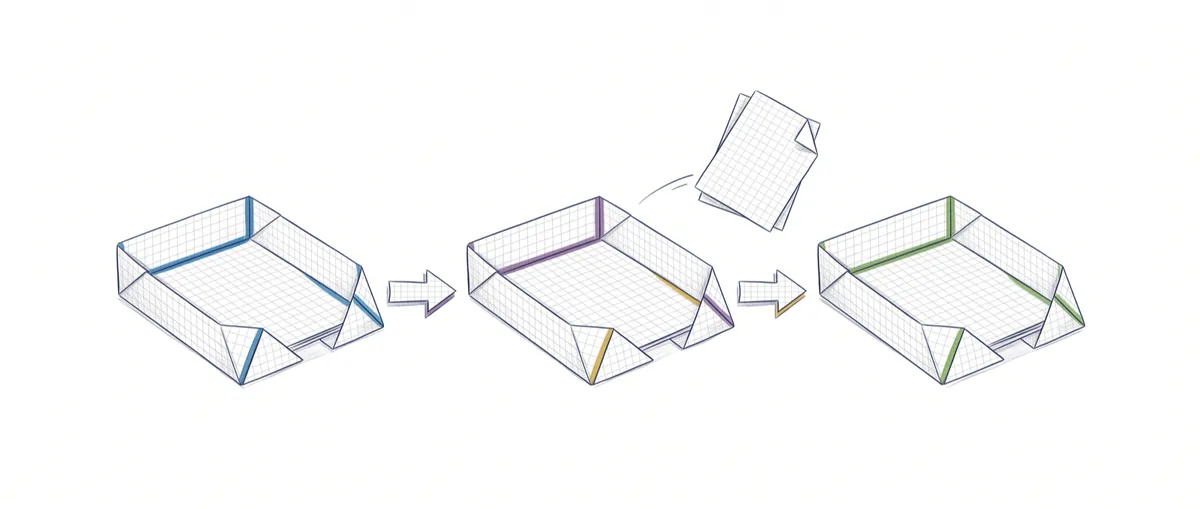
Think about how you’d mail a package. First you have loose items scattered on the table. You choose which ones go in the box and which stay out. You close the box, stick a label on it in your own handwriting, and leave it ready in your entryway. And only when you take it to the post office does it leave your house and travel to its destination. Git works the same way, and those four moments have names:
- Working directory: your project folder exactly as you see it in your editor. This is where your files sit with their freshly made changes, loose on the table.
- Staging area (also called the index): the box where you put the changes you want to save in the next commit. It’s a waiting room: you can add and remove things before you close it.
- Local repository: your project’s history, stored inside the hidden
.gitfolder on your machine. Every commit is a snapshot saved here. It hasn’t left your computer yet. - Remote repository: the copy that lives on a server like GitHub or GitLab, the one your teammates see and the one deployments are built from.
Each command moves your change exactly one hop between these areas. Let’s start with the one that puts things in the box.
git add: getting your changes into the staging area
git add copies the current state of the files you point it at into the staging area, the zone where you prepare the next commit. It’s the step where you choose: out of everything you’ve touched, this is what I want to save right now.
This is where git status becomes your compass. Before adding anything, take a look at what you have:
# View the state of your working directory and staging area
$ git status

# Changes Git hasn't put in the box yet:
#   modified: login.js       (already-tracked file, edited)
#   untracked: notas.txt  (new file Git has never seen)
That’s a simplified read of what Git actually shows you, not the literal output. The real message is longer, with usage hints for git add and checkout. But the core wording above (Changes not staged for commit:, Untracked files:) matches Git’s real English-language messages closely. If your OS or terminal is set to a different display language, git status may print those lines translated instead, which doesn’t mean anything is broken.
To put a specific file in the box, you name it. To put every change in the folder in at once, you use the dot:
$ git add login.js   # stages only login.js
$ git add .          # stages ALL changes in the current folder
Two things git add doesn’t do, and that confuse people early on. It doesn’t save anything permanently: it just prepares the box for the next commit, and you can run it as many times as you want. And it only captures the file’s state at the moment you run it. If you edit login.js again after running git add login.js, that latest edit stays out until you add it again.
That waiting room is more powerful than it looks, and deserves its own explanation once you want to get the most out of it. You’ll find it in the staging area explained in detail. And if git status output reads like hieroglyphics to you, here’s how to read it line by line.
git commit: snapshotting the staging area
git commit takes a snapshot of what’s in the staging area and saves it permanently in your local repository, with a unique identifier and a message you write yourself. It seals the box: from that point on, that set of changes is recorded in the history and you can always come back to it.
Only what was in the staging area makes it into the commit. Whatever you left out with git add doesn’t ride along in this photo.
# Snapshot what's in the staging area and add a message
$ git commit -m "Add validation to the login form"

[main a3f9c2e] Add validation to the login form
 1 file changed, 8 insertions(+)
That a3f9c2e is the hash, your commit’s identifier. It’s a hexadecimal code Git calculates from the snapshot, the previous commit, the author, and the message: any difference in that data produces a different hash. It lets you refer to that exact commit among all the others. The message is for humans: your future self and your teammates will read it to understand what changed without opening the code.
Here’s the detail almost no one tells you at the start: that commit lives only on your machine. It’s saved, yes, but inside the .git folder on your computer. No one else sees it yet. For that, you need the last hop.
git push: sending your commits to the remote
git push is the only one of the three commands that talks to the server: it sends the commits you have in your local repository to the remote repository and uploads the data that isn’t there yet [1]. Add and commit always work inside your machine. Push is the one that crosses the door.
# Push your local commits from the main branch to the remote called origin
$ git push origin main
origin is the default name of the remote repository, usually the one you cloned at the start. main is the branch you’re sending. So git push origin main reads as “push my main branch to the origin remote.” You don’t have to wrestle with these two names every day: once the branch is already linked to its remote, a plain git push is enough.
Until you run this command, your teammates see nothing of what you’ve done, no matter how many commits you have. The remote doesn’t guess what’s on your machine. It only knows what you’ve sent it.
What each command moves
Three commands, three hops. Here’s the table worth keeping in your head:
| Command | From | To | Touches the remote? |
|---|---|---|---|
git add | Working directory | Staging area | No |
git commit | Staging area | Local repository | No |
git push | Local repository | Remote repository (GitHub) | Yes, the only one |
Look at the last column. The first two commands never leave your computer; the third one is what publishes.
The everyday loop
On a real workday you don’t run the three commands just once. You repeat the cycle every time you finish a unit of work worth saving. The pattern is always the same: edit, check the status, stage, commit, and every so often, push.
# 1. Edit files in your editor and save them
# 2. Check what changed
$ git status

# 3. Put what you want to save into the box
$ git add login.js

# 4. Snapshot the change with a clear message
$ git commit -m "Fix the login error message"
You can repeat steps 1 through 4 several times over the course of the morning, piling up commits in your local repository. When you want to share your progress, you push it all at once:
# Push every commit you've accumulated
$ git push
Edit, status, add, commit, and push when it’s time. That’s the whole loop. The only piece you decide is how often you commit (small, frequent commits are best) and how often you push.
Here you can practice it without any fear of breaking anything, moving a change through the four areas:
Loading exercise...
Common mistakes when you’re starting out
Almost every early stumble comes from forgetting which area your change is currently passing through. These are the ones you’ll see over and over.
Saving in your editor is not the same as committing
You hit Ctrl+S, watch the modified-file dot disappear in your editor, and assume it’s already saved in Git. It isn’t. Saving in your editor only writes the file to your working directory. As far as Git is concerned, that change is still loose on the table until you add and commit it. They’re two different “saves” happening in two different places.
Committing and expecting it to reach the remote
You run git commit, see the message with the hash, close your laptop, and the next day a teammate tells you they don’t see your changes. Makes sense: git commit saves locally. Without git push, your work hasn’t left your computer. The commit exists, but only for you.
git commit -am with a new file
The git commit -a -m "..." shortcut (or -am) is convenient because it does add and commit in a single step, but it has a trap that will bite you sooner or later. The -a flag only puts files Git already knew about (ones you’ve modified or deleted) into the commit. A new file Git has never seen doesn’t get in [2].
# You create a NEW file and use the shortcut
$ git commit -am "Add the contact page"
# contacto.html stays OUT of the commit: Git wasn't tracking it yet
The fix is an explicit git add contacto.html the first time, so Git starts tracking that file. From then on, -am will include it in subsequent commits.
git push with nothing to push
You run git push and Git replies Everything up-to-date. That message isn’t a failure. It means you have no local commits pending to send. It almost always means you forgot the commit, or you saved in your editor but never got around to add and commit. Check with git status and git log before assuming Git is broken.
nothing to commit
You run git commit and get nothing to commit, working tree clean. Translation: there’s nothing in the staging area to snapshot. Either you haven’t touched any files, or you touched them but never ran git add. Remember the order: without add filling the box, commit has nothing to save.
Checklist so you don’t get lost
- I know saving the file in my editor doesn’t create a commit
- I use
git statusbefore every commit to see what’s going in - I understand
git addselects the changes, and without itgit commitwon’t include them - I’m clear that
git commitcreates the snapshot, but only on my machine - I know
git pushis the step that sends commits to the remote - I remember that
git commit -adoesn’t include new, untracked files
If you want to internalize this loop hands-on instead of just reading about it, we work through it step by step, with interactive exercises, in the Git from zero to professional course.
Sources
- Official Git documentation, git-push. Confirms that push updates references in the remote repository and uploads the data not already there.
- Official Git documentation, git-commit. Describes the
-aoption: automatically stages modified and deleted files that are already tracked, but not new files.
Frequently Asked Questions
Why are git add, commit, and push three steps instead of one?
Because each command acts on a different area of a change’s journey. git add moves changes from the working directory to the staging area, git commit saves them as a permanent snapshot in your local repository, and git push sends them to the remote repository. Splitting them up gives you control: you choose what you save, when you lock it into your history, and when you share it with everyone else.
Does git add . add everything, even what I don’t want to push?
Yes, git add . puts every change in the current folder into the staging area: new, modified, and deleted files alike. That’s why it’s worth checking with git status first, and if you only want to save part of it, adding files by name instead of using the dot. To permanently leave files out (like secrets or dependencies), there’s the .gitignore file.
Can I skip the staging area with git commit -a?
Partly. git commit -a does the add and the commit in a single step, but only for files Git was already tracking that you’ve modified or deleted. A new, untracked file doesn’t get in: the first time, you need an explicit git add so Git starts following it.
What does origin main mean in git push origin main?
origin is the name of the remote repository (usually the one you cloned) and main is the branch you’re sending. Together they mean “push my main branch to the origin remote.” Once your local branch is already linked to the remote one, you can just type git push and Git knows where to go.
Does git commit push my code to GitHub?
No. git commit saves a snapshot in your local repository, inside the .git folder on your machine. No one else sees it. The command that pushes your code to GitHub is git push, the only one of the three that talks to the server.
Related articles
Git from scratch: what it is, why it exists, and how to make your first commit
Git is a mental model before it's a list of commands you memorize. This guide covers everything from the why to your first commit, assuming zero prior knowledge.
Git's Staging Area Explained: The Four Zones
What Git's staging area is, why it exists, and how your changes travel through the four zones: working directory, staging area, local repo, and remote.
git status: How to Read What Git Is Telling You
Learn to read git status output step by step: staged, unstaged, and untracked files, the branch line, and the short format.