
Git's Staging Area Explained: The Four Zones
What Git's staging area is, why it exists, and how your changes travel through the four zones: working directory, staging area, local repo, and remote.
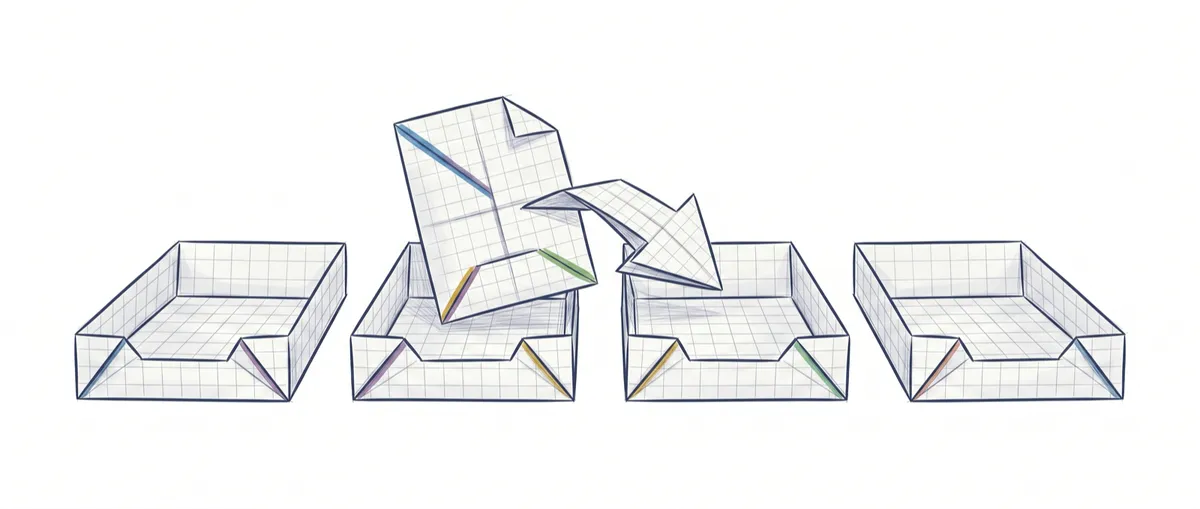
The first time I used Git for real, I typed git add . because I’d copied it from a tutorial, with no idea what that dot did. A while later I made a commit and discovered I’d included a file with an API key that should never have left my machine. Git’s staging area is exactly the zone that exists so that doesn’t happen: it’s the filter where you decide what goes into each commit and what stays out.
To follow this post you only need to know that Git keeps your project’s history in commits, and to have made one by copying commands. If you want to go even further back, first steps with Git is where to start. Here we’ll look at where your changes actually travel, and why git add isn’t an optional step you can skip without understanding it.
Where do your changes go in Git?
A change in Git travels through four zones before it ends up shared with your team: the working directory, the staging area, the local repository, and the remote repository. Each zone is a distinct place where your code can live, and every Git command is really just moving things from one zone to another.

Think of it like packing a parcel to send. The working directory is your table, cluttered while you work. The staging area is the box where you put only what you want to send. The local repository is the record of every parcel you’ve sealed, kept at home. And the remote is the post office, where the parcel becomes accessible to everyone else.
Here’s the full picture of the four zones and the commands that move things between them:
| Zone | What it holds | Command that adds things | Command that removes them |
|---|---|---|---|
| Working directory | Your files as you’re editing them right now, with changes not yet saved to history | You edit with your editor | git restore file discards the change |
| Staging area (index) | The snapshot of what will go into the next commit | git add file | git restore --staged file |
| Local repository | The commit history stored on your machine | git commit -m "..." | (not applicable) |
| Remote repository | The shared history on GitHub, GitLab, or similar | git push | git fetch brings in, doesn’t remove |
Let’s go zone by zone, starting with the one you already know without knowing its name.
The working directory: where you edit
The working directory is your project folder as you see it in your editor. When you open a file, change a line, and save, that change lives here, and only here. Git hasn’t done anything with it yet.
This matters: saving a file in your editor isn’t the same as saving it in Git. As far as your operating system is concerned, the file is already safe on disk, but for Git’s history that change doesn’t exist yet. If you deleted the folder, it would be lost.
Git does notice you’ve touched something. If you type git status, it will tell you there are changes “not staged”, meaning changes that are in the working directory but that you haven’t staged yet. That’s where the next zone comes in.
What is the staging area and why does it exist?
The staging area is the intermediate zone where you prepare exactly which changes will be part of your next commit. It’s also called the index, and both words mean the same thing: it’s the same place with two names [1]. When you read “index” in Git’s documentation, they’re talking about the staging area.
The question everyone asks when starting out is: why is there an intermediate step? Why doesn’t Git just save what I changed and be done with it? The answer is that the staging area gives you control over what goes into each commit.
Imagine that in one work session you fixed a bug in login.js and, along the way, changed some colors in estilos.css. Those are two different things. If you put them in the same commit, three months from now, when you’re looking for when you touched the login, you’ll find a commit that mixes the fix with style changes that have nothing to do with it. The staging area lets you stage only login.js, commit it with its own message, and then stage estilos.css in a separate commit. Every commit tells a single story.
That selective curation is the whole reason the staging area exists. You don’t stage “everything you’ve touched” in one go: you stage what makes up a coherent change. When you type git add estilos.css, what you’re telling Git is “this file, in its current state, goes into the next commit”. The rest of your changes stay waiting in the working directory.
Here you can see it at a glance with git status. I’ve changed two files and created a new one, but I’ve only staged one:
# archivo.js: modified and already staged with "git add archivo.js"
# estilos.css: modified but NOT staged
# notas.txt: new file Git doesn't track yet
git status
Git’s actual output separates those three states into three distinct blocks (the # comments are mine, added to point out which zone each block represents; they don’t appear in Git’s real output):
Changes to be committed:          # already in the staging area, will go into the commit
	modified:   archivo.js

Changes not staged for commit:    # in the working directory, outside the commit
	modified:   estilos.css

Untracked files:                  # new file, Git doesn't track it yet
	notas.txt
Notice the detail: archivo.js is under “Changes to be committed” (staged), and estilos.css is under “Changes not staged for commit” (unstaged). The same git status is showing you two zones at once. If you committed right now, only archivo.js would go in. The other two would stay out, waiting.
Local and remote repository: two histories, not one
The local repository is the commit history that lives on your machine, inside the hidden .git folder. When you run git commit, Git takes what’s in the staging area and records it there as a permanent point in the history. From that moment on, the change is truly saved: you can go back to it even as you keep editing. If you want to understand what’s actually stored inside each of those points, check out what a commit actually is.
The remote repository is a copy of that history that lives on a server, usually GitHub or GitLab, shared by your team. It’s what you see when you visit the project’s web page. A git commit doesn’t touch it: the commit stays on your machine until you send it with git push.
This separation confuses a lot of people at first, and understandably so. You make a commit, see the confirmation message, and assume the change is already “uploaded”. It isn’t. It’s still only in your local repository. Until you run git push, no one on your team can see that commit. It’s the difference between sealing the parcel at home and taking it to the post office.
How do I move changes between zones?
Every basic Git command is, underneath, an arrow that moves your code from one zone to the next. Once you’re clear on the zone you’re leaving and the one you’re heading to, the commands stop being magic copied from a tutorial.
To stage a specific change, name the file instead of using the dot:
# Moves ONLY archivo.js from the working directory to the staging area.
# It doesn't touch any other pending change you have.
git add archivo.js
If you stage something by mistake and want to take it out of the staging area without losing what you wrote, use git restore --staged. It returns the file to the working directory with your changes intact [2]:
# Removes archivo.js from the staging area.
# Your changes are NOT lost: they go back to the working directory.
git restore --staged archivo.js
This used to be done with git reset HEAD archivo.js (HEAD is your latest commit), and it still works the same way; you’ll see that command in older tutorials. git restore --staged is the modern form, and easier to remember, since the name says exactly what it does.
Once the staging area has exactly what you want, you commit it to the local repository with a message that explains the change:
# Takes everything in the staging area and creates a commit
# in your LOCAL repository. Nothing is sent yet.
git commit -m "Fix login bug"
And to get that commit to the team, you send it to the remote repository:
# Sends your local commits to the remote (for example, to GitHub).
# Now yes: the rest of the team can see them.
git push
Four commands and four arrows between zones make up the whole mental model. What changes between projects are the file names, not the journey. If you want to see that journey from start to finish with more examples, check out the git add, commit, and push flow.
Now try it yourself. In this interactive exercise you have a handful of changes in the working directory: decide which ones you stage in the staging area and which ones you leave out before committing.
Loading exercise...
Common mistakes with the staging area
Almost every stumble with Git early on comes from not seeing these zones as separate places. These are the ones I’ve run into the most.
Thinking git add saves your changes
git add doesn’t save anything in the history. It only stages. The only command that creates a permanent point is git commit. If you run git add archivo.js, close your laptop, and never get around to committing, you haven’t saved the change in Git: it’s still sitting in the staging area, up in the air.
git add . blindly
The dot in git add . stages everything you’ve changed in the current directory and below. It’s convenient, but it’s also how I ended up leaking that API key. If you don’t look at what you’re staging, you end up including things that shouldn’t be there: a secrets file, a heavy node_modules folder, a local config file. The healthy habit is to type git status before any git add ., and to keep a .gitignore that excludes what should never go in. It’s not that git add . is wrong, it’s that it shouldn’t be used without looking first.
Thinking git commit -a includes your new files
There’s a shortcut, git commit -a, that stages and commits in one step to save you the git add. The catch is what it covers. git commit -a only includes modifications and deletions of files Git was already tracking; new files, the ones Git has never seen (the “untracked” ones), are left out [3].
# Stages and commits in one step, BUT only files already tracked.
# A new (untracked) file does NOT go in here: it needs "git add" first.
git commit -a -m "Update login"
If you just created nuevo-modulo.js and rely on git commit -a to send it up, you’ll be surprised to find it’s not there. For new files, git add first, always.
Confusing commit with push
Making a commit and assuming the change is already uploaded is the most common misunderstanding, and we’ve already seen why: the commit lives in your local repository until you run git push. If your teammate can’t see your work, before looking for what went wrong it’s worth checking whether git push actually happened.
Practice Git’s zones thoroughly
Seeing the diagram helps, but the mental model sticks when you move changes between zones yourself and see what goes into each commit. In the course Git from Zero to Professional you practice the staging area with interactive exercises like the one above, step by step and without installing anything, until curating a commit becomes second nature.
Sources
- Pro Git: What is Git? (“The Three States” section). Git’s technical name for the staging area is “index”, and “staging area” works just as well as a synonym.
- Official git restore documentation (git-scm.com). The
--stagedflag restores only the index and leaves working-directory changes untouched; it’s equivalent togit reset HEAD. - Official git commit documentation (git-scm.com). Behavior of the
-aflag: it only stages modifications and deletions of files already tracked, not new files.
Frequently Asked Questions
Can I skip the staging area?
Partly, yes, with git commit -a, which stages and commits in a single step. The important nuance is that it only works with files Git was already tracking: modifications and deletions. New files still need an explicit git add. And while the shortcut is convenient, it takes away the file-by-file control over what goes into the commit, which is exactly what the staging area exists for.
Is the staging area the same as the index?
Yes, they’re two names for exactly the same zone: “staging area” is the descriptive name and “index” is the technical term you’ll see in Git’s documentation.
What’s the difference between git add and git commit?
git add moves your changes from the working directory to the staging area: it stages them, but doesn’t save them to history. git commit takes what’s in the staging area and creates a permanent point in your local repository. One stages, the other saves. You need both for a change to be recorded in Git.
How do I remove a file from the staging area without losing the changes?
With git restore --staged:
# Removes archivo.js from the staging area without touching your changes,
# which go back to the working directory intact.
git restore --staged archivo.js
The classic equivalent, which you’ll see in older tutorials, is git reset HEAD archivo.js, and it does the same thing.
Related articles
Git from scratch: what it is, why it exists, and how to make your first commit
Git is a mental model before it's a list of commands you memorize. This guide covers everything from the why to your first commit, assuming zero prior knowledge.

What Is a Git Commit (and Why It's a Snapshot, Not a Patch)
A Git commit is a complete snapshot of your project at a single instant. Understand what it actually stores and why it lets you travel back in time.
git add, commit, and push: Git's basic workflow explained
What git add, git commit, and git push actually do, and why they're three separate steps: a change's journey through Git's four areas, explained from scratch.